For rainy days… customizing your umbrella
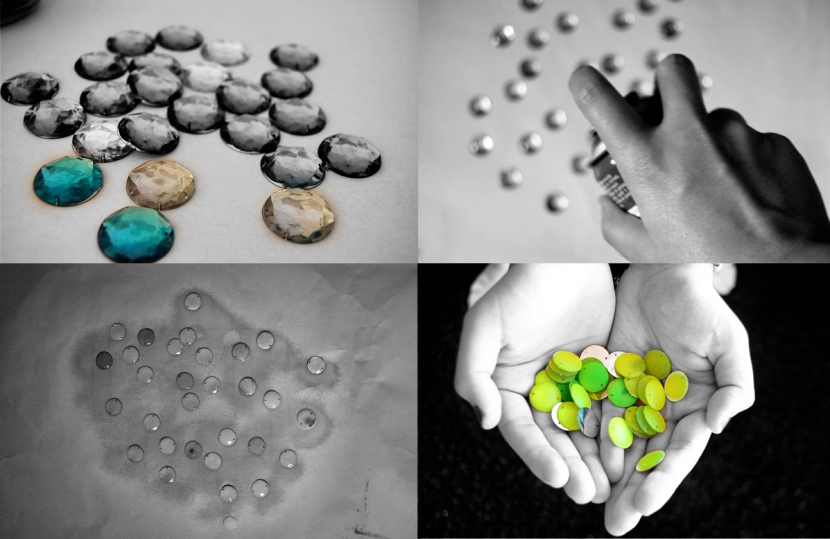
Nothing more beautiful to see in a grey-rainy day than a beautiful umbrella in the street. I am always looking for pretty umbrellas, so I thought to adding some color and customizing my own umbrella. The materials: first of all try to find a basic umbrella to work with, for me the colors options were: white, black or a transparent one. Spray paint, I choose neon colors. Some kind of adhesive, you can try with UHU (is waterproof) and some kind of crystal fancy stones with flat top.
 First step: paint the crystal stones with the spray paint. Let it dry. Once you have all the crystal stones ready, start glueing them in the top of the umbrella. I use the design of the umbrella to spread the crystals in a even way. Remember not to put so many, because you don´t want to loose crystals with the rain. So it´s important that the glue you use is waterproof. Let the umbrella dry well before using it.
 Ta da! Please find some rain and enjoy your grey day with a color umbrella 🙂
 Spanish: Nada más lindo que en los días lluviosos cruzarse en la calle con paraguas coloridos. Así que para esta semana vamos a customizar un paraguas con unos pequeños detalles. Los materiales que se necesitan para este proyecto son: un paraguas (obviamente!) capaz podes usar uno que tengas en tu casa, o si vas a comprar, los mejores colores para customizarlo serían: blanco, negro o trasparente como el que yo elegí para este proyecto. Lo otro es conseguir un adhesivo a prueba de agua (yo utilice UHU y lo recomiendo). Vamos a necesitar pintura en spray del color que quieras, mi opción fue en colores neones. Y por último piedras o cristales de plástico en cualquier forma, pero que la parte de abajo sea plana para poder pegarlos facilmente. Lo primero sería pintar las piedras o cristales utilizando el aerosol. Luego de dejar secar, podras comenzar a pegarlas en el paraguas. Es importante dejar secar durante un buen rato esto, ya que será crucial para que las piedras no se despeguen con el uso. Utilizando el diseño del propio paraguas pueden ir eligiendo donde colocarlas. Mi opción fue poner en un gajo si y un gajo no para ayudar a que el paraguas cerrara correctamente. Un proyecto súper fácil y súper divertido para hacer en un ratito y tener un paraguas personalizado! 🙂
Happy weekend people!
Love, Nina
p.s: thanks to my sis to pose in the pic. 🙂