Category: DIY
On making your own art or “something close to art”
 I been thinking how to decorate and make more “our own” our apartment. We have been living in this place for over and year and a half and I have to admit I´ve been a little lazy about the hanging art chapter. So last week I was in a decoration mode and try to fill my walls with things I like. For me was really important to exercise my creativity trying to do my own art or as I call it “something close to art”. This is a way of making your home more personalize and yours. And is good for the pocket too!


For rainy days… customizing your umbrella
Nothing more beautiful to see in a grey-rainy day than a beautiful umbrella in the street. I am always looking for pretty umbrellas, so I thought to adding some color and customizing my own umbrella. The materials: first of all try to find a basic umbrella to work with, for me the colors options were: white, black or a transparent one. Spray paint, I choose neon colors. Some kind of adhesive, you can try with UHU (is waterproof) and some kind of crystal fancy stones with flat top.
 First step: paint the crystal stones with the spray paint. Let it dry. Once you have all the crystal stones ready, start glueing them in the top of the umbrella. I use the design of the umbrella to spread the crystals in a even way. Remember not to put so many, because you don´t want to loose crystals with the rain. So it´s important that the glue you use is waterproof. Let the umbrella dry well before using it.
 Ta da! Please find some rain and enjoy your grey day with a color umbrella 🙂
 Spanish: Nada más lindo que en los días lluviosos cruzarse en la calle con paraguas coloridos. Así que para esta semana vamos a customizar un paraguas con unos pequeños detalles. Los materiales que se necesitan para este proyecto son: un paraguas (obviamente!) capaz podes usar uno que tengas en tu casa, o si vas a comprar, los mejores colores para customizarlo serían: blanco, negro o trasparente como el que yo elegí para este proyecto. Lo otro es conseguir un adhesivo a prueba de agua (yo utilice UHU y lo recomiendo). Vamos a necesitar pintura en spray del color que quieras, mi opción fue en colores neones. Y por último piedras o cristales de plástico en cualquier forma, pero que la parte de abajo sea plana para poder pegarlos facilmente. Lo primero sería pintar las piedras o cristales utilizando el aerosol. Luego de dejar secar, podras comenzar a pegarlas en el paraguas. Es importante dejar secar durante un buen rato esto, ya que será crucial para que las piedras no se despeguen con el uso. Utilizando el diseño del propio paraguas pueden ir eligiendo donde colocarlas. Mi opción fue poner en un gajo si y un gajo no para ayudar a que el paraguas cerrara correctamente. Un proyecto súper fácil y súper divertido para hacer en un ratito y tener un paraguas personalizado! 🙂
Happy weekend people!
Love, Nina
p.s: thanks to my sis to pose in the pic. 🙂
Customizing your USB flash drive
I´ve been wanting for a while to buy those usb flash drives with fancy designs (check here). But, for one reason or another I have been using my old and regular ones. So I decide to personalize my grey/black boring flash drive for good! And here are the results 🙂
 I try with two different paints: acrylics and nail polish and I recommend you the last one because the texture of this paint is perfect for painting metal. If you have a plastic flash drive you can go with the acrylics.
 I paint stripes (super easy!!) and now my drives are very recognizable among others 😉
Enjoy your painting! Love,
Nina.
Painting a wooden hand mirror..

In case you don´t know the earliest mirrors were hand mirrors (not the big ones we are used to). Their were very popular in Europe in the last century and were a “luxury item” made with silver and expensive materials. I thought it would be fun to have my own hand mirror so last week I bought a wooden hand mirror with an amazing shape in a craft store. The next step was to put all the colors i love and style it my way. So here is the result! I inspire myself in one of my own drawings to make the face even if then I change it randomly. Drawing in the wood can be very helpful to follow the design. The important thing is to paint coat by coat the different areas and take some time to allow the paint to dry. I used a variety of very bright colors of acrylics and add the word “beautiful” with a sharpie.

 A very simple and fun project! Hope you try yours!
Love, Nina 🙂
DIY vs. BIY… shoe laces
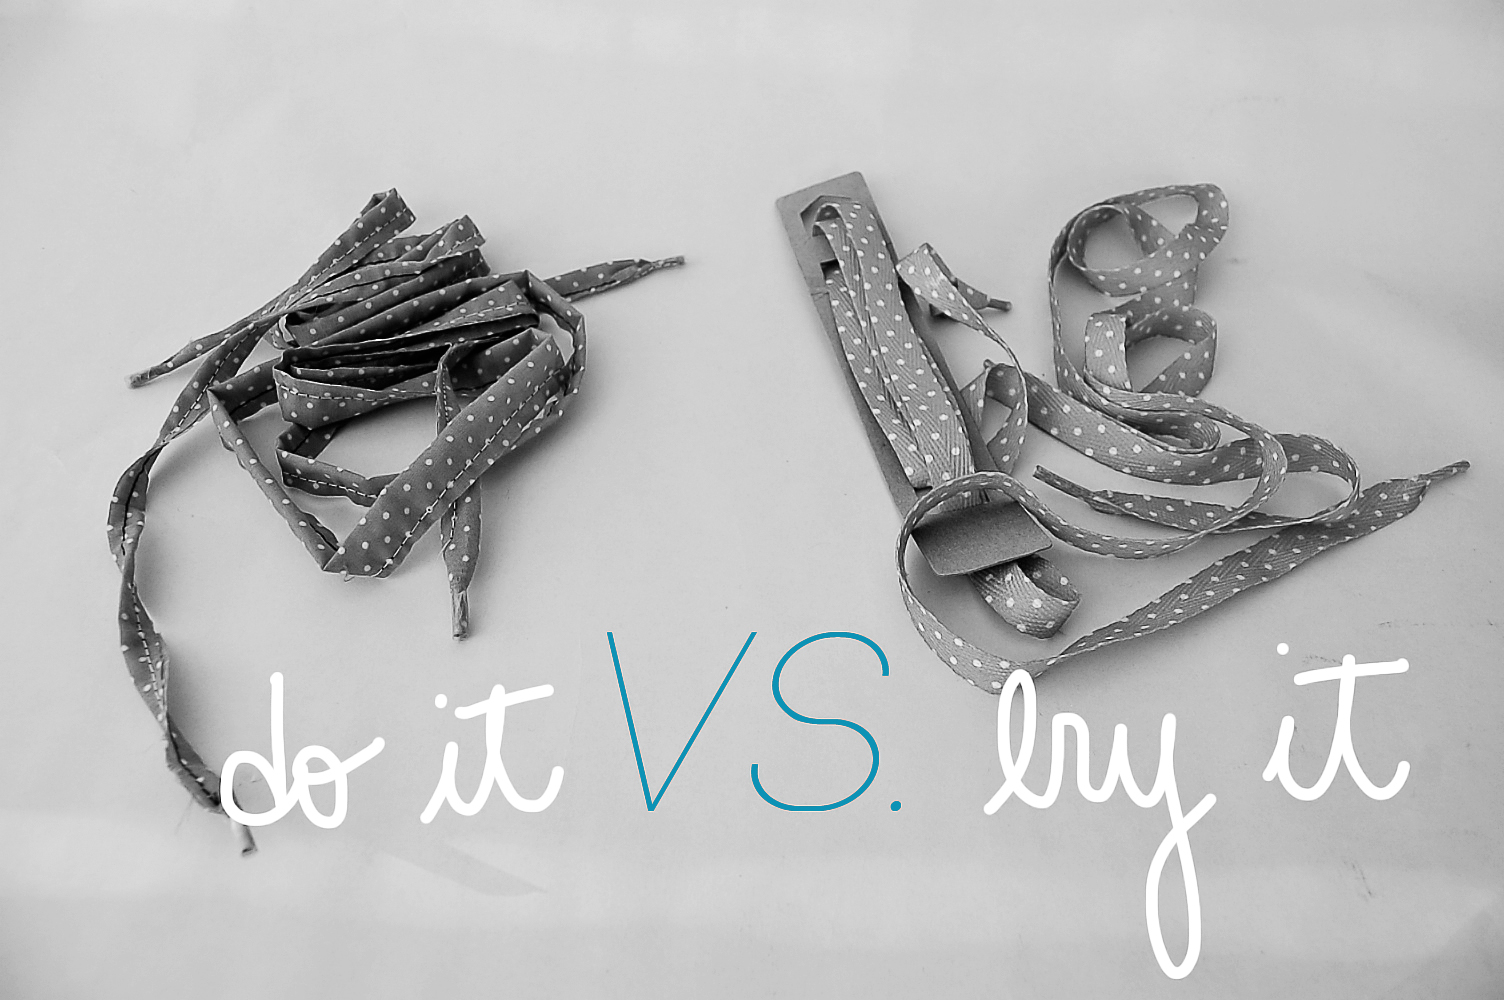 Since I bought me a pair of new shoelaces from Converse I had the idea of trying to make my own pair. It was really fun, easy and quick project. I really recommend it, because with new shoelaces you can refresh a pair of sneakers in a wink! For this project you would need: fabric (I recommend you to use an elastic one), adhesive tape, scissors, pins, needle and thread or in my case I used a sew machine.
 1. 2. The first step is to cut the fabric in a very long rectangle shape. 3. Make a cut in the middle of the first piece of fabric, making two simetric rectangles. 4.5. Once the fabric is cut, you are going to have two identical pieces, so with the help of the pins fold it together and put some pins to help you in the sewing process. 6. Try to sew the two sides of the fabric as straight as you can, with a sewing machine it´s a very quick process. 7.To finish you can use transparent adhesive tape as a neat termination. You can roll the endings of the fabrics and add the adhesive tape. 8. Cut the remaining of the fabric. Finally choose a pair of sneakers to try your new shoe laces and voilá!
 Congratulations you have new shoe laces!!! I have the lucky to find a very similar fabric for this project but you can make them with the fabric pattern you like or even in a plain color!

Polka dots pants with polka dots shoe laces! What do you think??
Love,
Nina:)
Making a Candy Lamp
 Maybe because easter is around the corner or maybe because I am a big fun of candies I decided to make a CANDY LAMP. And the perfect ingredient I found were Marshmallows (YUMMY!!). In case you want to give a try to this project you would need: a glass vase or a glass jar (I found a flower vase that was perfect for this project), a lamp shade (yellow was my choice), lamp holder (I use an old one, but you can buy a new one in a hardware store), a light bulb and contact film.
 The process is really simple, first you have to fill the vase with candies. You can put them randomly or try to make a pattern.
 Once you finish, you have to put together the lamp holder and the lamp shade (this is easy because if you buy it together everything comes assemble). After that, you can use the contact film to seal the top of the vase (to maintain the candies). Last but no least install the light bulb and is ready!!!
 This project was perfect for my new “Pop color spot” in my living room. With little details and home made projects like this you can add some color and personality to your home. I am in love with this space I create.
 Hope you like it! And please in case you want to try this project remember you can choose other kind of candies. Please share pictures of your candy lamp!! With this candy lamp maybe you can feel tempted to eat it (I would be for sure).
Love and happy friday!
Nina 🙂
Restyling a pair of sandals
 This project was super easy and fun! I was needing some change in one of my super comfy sandals-flipflops. So I decided to make them a little more “formal” to use them to go out. For this project I use: black fabric, studs, adhesive, thread, needle, scissors and some old coins.
 1. The first thing you need to do is choose some sandal you want to restyle. Then the first step is cut the black fabric in a double triangle shape. 2.3. Once you have it cut, using the adhesive, stick it together so you will have one perfect triangle. 4. 5. After doing this you can start adding the different studs in the black triangle. 6. Sew some coins in the edge of the triangle. 7. Add some adhesive in the sandal(I used UHU for the adhesive which is really good), in my case it was super easy because of the shape of the original sandal. 8. Paste the triangle with the sandal and if you want you can secure the triangle by stitching it to the sandal.
 Hope you like it!! I love my new sandals 🙂
Love, Nina.
DIY vs. BIY… a hippie cooking apron

I have to admit that I am not a very “cooking person” I never have the natural talent and I didn´t practice it a lot either. For me is a an unresolved matter I hope some day I will take the leap into it. But for this DIY vs. BIY project is not necessary to know how to cook, the only request is to have some crafting time and have fun in the process. This week we are making a beautiful hippie cooking apron. The materials you will need for this project are: bleach, jean, string, ribbon, textile paints, brush, sewing kit, scissors, paper.

1.2. The first step is to cut the fabric with three molds: one for the main part of the apron and the others for the above and low part. 3.4. Once cut, you will need the string to isolate some zones of the fabric that you want to maintain the original color of the jean. 5. Immerse the part of the fabric you want to be discolor into the boil with water and bleach. 6. After these process remember to cut the strings and wash the fabric with lots of water.  This is a important step, so take your time and once the fabric is dry you can move to the final stage.
 7. Put together all the three pieces. 8. Sew all of the parts, I did it with a sewing machine, but you can do it by hand, just calculate extra time. 9. To give some color to the jean I add some fluo string in the edges of the apron, I sew it by hand by making a zigzag 10. Add some ribbon so you can tie your apron in the back.
 I wanted to decorate the apron with some “famous cooking words”, I used “Bon appetite” and I add some milkshake shapes. For this I recommend you textile paints. In my case I used some pastel tones.
 I also add some ribbon and pom-poms (of course my horse!!) to add more details, but depends on you.
 Hope you like this project and I have to say thanks to my little sister who help a lot in this project!!
Happy cooking time!!
Love,
Nina:)
Restyling an old purse
 I have to be honest about my wardrobe and accessories and I admit I have so many purses I am not using, that I decided to make a refresh. So today I am going to share with you a simple restyle project. Remember that with little details you can change everything. Here is the process:
 The first step is to choose one item with potential to change. 1. My pick was this white purse. I sketch in my head the final idea, I wanted to have a Kate Spade look with a black, yellow palette. 2. Then I used masking tape to do black horizontal stripes. 3.The technique was the same I used to dying leather in the DIY vs. BIY Tote Project.
 4. I take advantage of the original design of the purse, painting in yellow (a neon tone) some space in the front of the purse. 5. Once the black paint was dry I removed the masking tape.
 The final step was adding some pom-poms (if you already know me a little, you will know about my pom-pom addiction over here). You can look the tutorial of how to make your own pom-poms here. But it´s really easy and funny.
 I have to admit this project really worth it, because the final result was amazing! A completely new purse in less than three hours!! Are you ready to look into your wardrobe and do some restyling? I am definitely picking new things to restyle!!
 Happy Friday, love,
Nina:)
DIY vs. BIY… Photo Display
 For the “DIY vs. BIY” project of this week, I choose to make a photo display. I love to print photos (I always have tons!) but the thing is that nowadays it´s no so common to print them. We are very used to just look the pictures in the computer or even share them in the different platforms that today became so popular: Instagram, Pinterest, Flickr and lots of other ones. So here is a very easy solution and a good excuse to print your photos and share them in your home.
 For this project you will need: metallic wire, pliers, acrylics paints, a brush, clothespins and mushroom head suction pads.
  1. First, cut the mettalic wire in the length you choose (depending on where you are thinking to put the display) 2. Pass the wire through the suction pad. 3.4.5 Secure the end by putting something in the end of the wire. For this you can use the plier. 6. Choose some bright colors and paint the clothespins.
 For painting the clothespins, I use some acrylics I have in my home, it´s no necesary to buy special paint for this project. The important thing is to add some beautiful colors to the display, so depending on your taste you can choose one single color (for a more serious display) or mix them like I did. The last ingredient: the photos!!! Hang them with the clothespins and that´s it! You have a beautiful photo display you can be proud of! Enjoy it!!

Love, Nina 🙂
